Getting Started
Setting The Admin UserStandard IconsAdding & Editing TeamsAdding & Editing PeopleAdding & Editing UsersSetting Local PasswordsSetting Geographic LocationsAdding Data CentresAdding ServicesReviewing Service GroupsService DetailsDeleting ServicesSetting Service DependenciesService Status EventsSetting the Admin User
Once you go to your ServiceView domain the first thing you will need to do on the home screen is to add an admin account that you can use to administer ServiceView.
When you first login, you will need to use the username "admin" and the pasword you have entered when activating the account (see install guide for this step).
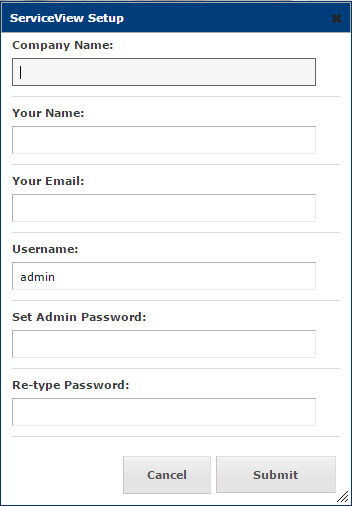
Fill in the dialog with your details and click Submit. After you click on Submit the admin username will be activated.
You can now log into ServiceView using the admin username and password.
 Note: The admin username should generally not be used except in the event other administrator accounts are deleted by mistake
How to Add, Edit & Delete
The following icons are used in ServiceView to manage data:
![]() Edit Icon
Edit Icon ![]() Add Icon
Add Icon ![]() Delete Icon
Delete Icon
To add an item click on the add icon located at the top right of all tables, a dialog will appear allowing a new item to be added.
To edit an existing item click on the edit icon for that item. The edit dialog will appear allowing you to make changes.
To delete an item or multiple items, check the checkboxes on the left and click on the delete icon at the bottom of the table.
The search feature can also be used to make it easier to find what you are looking for.
Adding & Editing Teams
Before we can add users teams should be added so that the employee can be "mapped" to their correct team. Typically add the individual teams of the IT departments who look after the services.
When using Active Directory or LDAP teams can be added automatically.
Teams should be added first so that the employee can be "mapped" to their correct team.
To do this click on the Admin tab on the left hand side of the screen, then select Teams.
Use the  button to open the Add team dialog, and start adding your teams. Initially add your organisation name, ITS for instance with "No Parent", then add your section and team. Teams can be changed later.
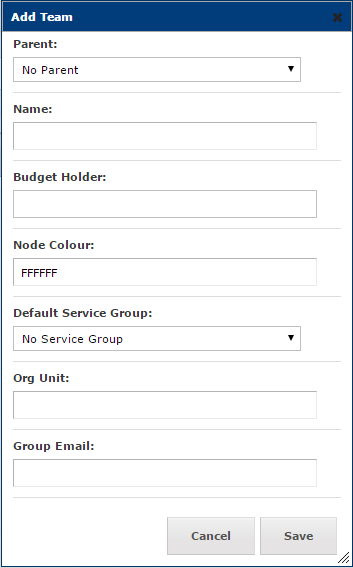
Fill in team details in the dialog box and click Save when done. You can leave Budget Holder, Org Unit and Group Email blank for now.
Adding and Editing People
ServiceView needs to know about the people who look after your IT services.
People should log in using their regular username. To add a person, click the Admin tab and click on People. Click the  button to open the Add Person dialog.
Complete the fields by first choosing the team out of the the drop down list. Then enter your name and email address. You can leave the position field blank for now.
Set the start date to the approximate date you started and leave the end date to 01-Jan-2999. This means that your position is not ending.
The FTE % field is used to represent whether a person is full time or part time. For expample, 100% would equal to 5 days per week (full time) and 60% would be 3 days a week (part time ).
ServiceView will use these values when it is calculating employee costs.
Include a username if you want to user to be able to login and use ServiceView, otherwise leave that field blank.
Click Save when finished.
Adding & Editing Users
Not all the people in the ServiceView database will want to log in, some of them will just be there so costs can be worked out. Equally some people may need to login but do not form part of the organisation. To accommodate for this ServiceView has the concept of users.
A user is someone who can log in and may be mapped to a person, in order to allow a person to login their username needs to be added in the Users section.
To add users, in the Admin menu click Users and click the  to open the Add User dialog.
Enter their name, email, username and for now enter a password. By entering a password, you will be able to login without using LDAP.
Select a role for the user:
- The administrator role will give this user complete acess to all features.
- The finance role gives the user access to financial data.
- The standard role will be read access and able to add services, this role will be given out to most poeple.
The role works out your position in the organisation and gives access accordingly. A manager will gain control over their staff and budgets.
In order to link this user with a person in the ServiceView database type their name into the "Map User To Person" field, this should auto-complete.
Roles
ServiceView supports four roles, each with a different level of access.
| Read Only | Users in this role may view reports, calendars and service dependencies but make no changes |
| Standard | Most users should be in this role. Access to staff information, budgets and the ability to make approvals is determined by ServiceView depending on the position in the organisation and which services the user is budget holder for. |
| Finance | These users are typically the finace officers or senior management. They are able to see details on all positions, people and budgets. |
| Administrator | The administrator users are able to make configuration changes. They have access to all information contained in the database including people, positions and budgets. |
Self-Serve User Registration
Once LDAP has been setup users are able to register for themselves using the New Users Register link on the login screen.
Users who are already setup as a person may select their name from the auto-complete Your Name field.
To enable self-serve registration the option ALLOW_SELF_REGISTER needs to be set to Yes. See the next section on configuring options.
Setting Local Passwords
In a stand-alone ServiceView instance local passwords need to be set to allow people to log in.
If it is configured with central passwords this step is not required.
Passwords can be set by clicking on the Users link in the Admin menu.
The users table is a list of everyone who can log in.
To set a local password for someone use the password icon ( ) and enter the desired password. This password will take precedence over central passwords if that is configured.
Set a password for everyone you want to be able to log into ServiceView.
By editing a user you are able to change their username and their permissions.
Setting Geographic Locations
Enter a list of locations where your data centres are located.
A location can be a city or a campus.
Optionally specify latitude & longitude, these will be used for google maps integration.
Locations can be set by clicking on the Locations link in the Admin menu.
Click the  and the Add Location dialog will open. Fill in all fields then press Save.
Setup Data centres
To add data centres click on the Data Centres link in the Infrastructure menu.
Use the  icon to add new data centres.
Enter the location of the data centre and its short and full name then click Save.
Adding a Service
Now we are ready to add our first service.
A service is the most important data item in ServiceView. A service is an IT or other service provided by, or used by your organisation.
Examples of services are email, finance system and VM farms.
Services are grouped into service groups depending on their function or ownership. Email would be in the email & messaging service group, the finance system might be in the applications service group and the VM Farm in the infrastructure service group.
Do not create a new service for each server used by a service. Equipment can be added to a service in a different section.
To add a service click on the Add Service link in the Services menu.
There are multiple fields which can be entered for each service. The minimum requirements for adding a service are to select the service group, and to specify a name and description for the service. Other fields can be entered if desired or can be entered at a later date.
Once a service is entered into ServiceView, it is given its own home page known as the service details page.
A service can be edited in the service details page to answer any missing fields at a later date.
Reviewing Service Groups
All services entered into ServiceView will belong to a Service Group which is a high level service category.
ServiceView comes preconfigured with recommended Service Groups however these can be changed if desired.
In the Service Groups page in the Admin menu you can add, modify or delete service groups as required.
- Typically the storage & Backup service group will contain storage and backup services.
- Infrastructure will contain servers and server farms.
- Underpinning technologies will contain directories, authentication system and identity management system.
- Networks will be network services such as DNS.
The rest will be in either the applications service group or in the group more specific to their purpose. If it is more convenient service groups can be created for each IT team allowing them to easily manage their services.
Service Details
To find a service, enter its name in the search box and click on go.
Alternativly in the Admin menu click Service Groups then click on the respective Service group to show all services in that group. You can then click on the service name from that list
The service details page contains information about that service.
Deleting a Service
To delete a service:
- click on the All Services link under the Services menu.
- Find the service or services you want to delete.
- Check the checkbox next to those services.
- And click on the Delete icon.
Note: this action cannot be undone. Do not delete the data centre service.
Setting Services Dependencies
The power of ServiceView is that it stores the dependencies between services and models their interactions.
In order to set service dependencies, click Services from the side menu and choose the service to enter the Service Details page and click on the Dependencies tab.
This page shows the current dependencies that are configured for this service. Initially there will not be any.
To set service dependencies scroll down and click the 'Add/Edit' button in the 'Required Services' section.
Enter the service this service depends on, for instance Blackboard depends on LDAP.
ServiceView catalogues service dependencies in 4 ways:
- The first way is that a service is required for service delivery. In this instance Blackboard needs LDAP to operate. If LDAP stopped working Blackboard would also stop working as no one could log in.
- The second type of service dependencies is that a service requires another service for some features. For instance Blackboard uses lecture recordings however if the lecture recording system breaks, Blackboard will still operate but will not be able to show lecture recordings.
- The third type of service dependency is for updates. In this example if the student system breaks, Blackboard will still work but new students and courses cannot be added.
- The fourth type of dependency is that a service requires another service for administrative or maintenance reasons. An example of this is backups, where by a services uses backups but does not require it in its everyday operation.
If every service owner enters the dependency details for each of their services we can build up a big picture of how IT services fit together. Complex models of IT across the organisation can be built up.
Note: Only include direct dependencies of any service. If for instance Blackboard depends on LDAP, and LDAP depends on Kerberos, then do not enter a direct dependency between Blackboard and Kerberos as it will inherit that dependency from LDAP.
Adding & Editing Service Status Events
Adding a Service Status Event
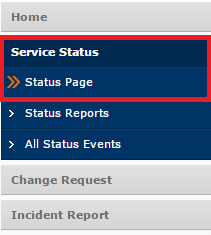
To add a Service Status Event click on the Service Status menu and select Status Page.
Click the  button to open the Add Event dialog
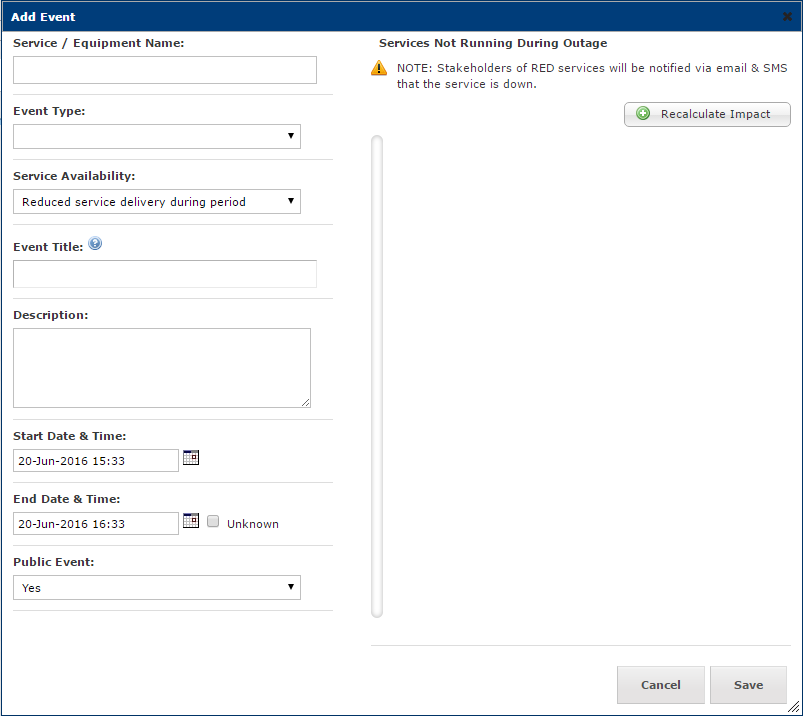
When the dialog box comes up, it will prompt the user to enter the follow lines of data:
- Service or Equipment Name: For this line the user will just need to start typing, as this section is auto complete to ensure consistency. (Note: if the service or equipment that the user is searching for is not listed here then they can contact the ServiceView team to get this information added).
- Event type: The user can choose from a drop down menu. The options listed are "For Information" (this event is just for the information of the end user, they will normally not have any disruptions for the use case), "Scheduled" (this is a change that has been planned and usually run through the approval process at the ITS CAB) and "Unscheduled" (this type of event can be a sudden outage or a result of a scheduled outage that was not planned on).
- Service Availability: The user can choose from "No Impact on Service During Period" (this option is chosen when the service will run as normal with out any disruptions during this time), "Redulced Service Delivery During Period" (this could be that certain areas will not work as usualbut the main core functions are still avaiable) and "Service NOT Available During Period" (The service will be fully down during this period or the main functions will not be available).
- Event Title: is open text. This title should be used as the service impact of the event, which will be public rather than stating the technology, nature or purpose of the change.
- Desription: This is open text, where the event can be described in detail.
- Start Date and Time: The start or predicted start date and time of a scheduled or unscheduled event.
- End Date and Time: The end or predictedend date and time of scheduled or uncheduled event.
- Public Event: This yes or no drop down will either push the event onto the ITS website or keep it private on the ServiceView site.
One the event information has been populates, a list of services or equipment that will be impacted will be listed (taken from the dependencis listed in ServiceView).
From this data a list of stakeholders for these affected services will also be listed allowing the user to send out email communications directly from ServiceView.
The user also has an option to send out updates to the stakeholders when any information is updated, such as the service being available again after an outage.
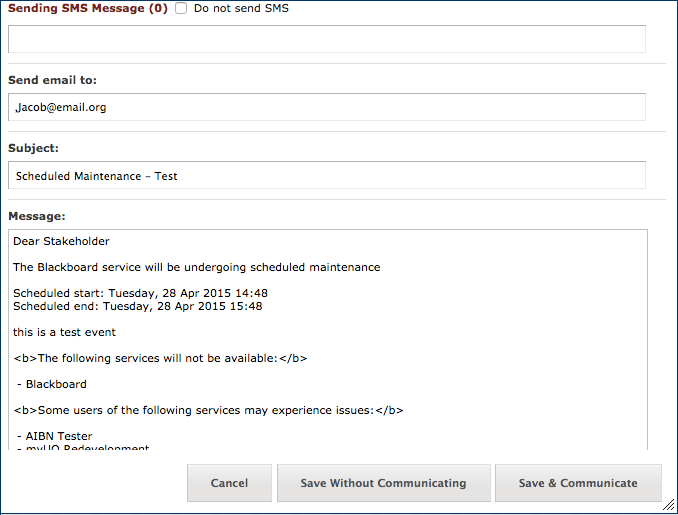
This image is the automatically generated text email that would be sent out to the stakeholders. The user can add more poeple to the recipient list and also add any extra information that they feel is goingto be relevant for the stakeholders to know.
Another option for the user is to add a mobile number of a stakeholder and they will receive this message via SMS.
Editing a Service Status Event
To edit a Service Status Event, choose or search for the event that you would like to edit and click on the edit icon.
A dialog window will pop up and allow you to edit any sections that have been previously been filled in.
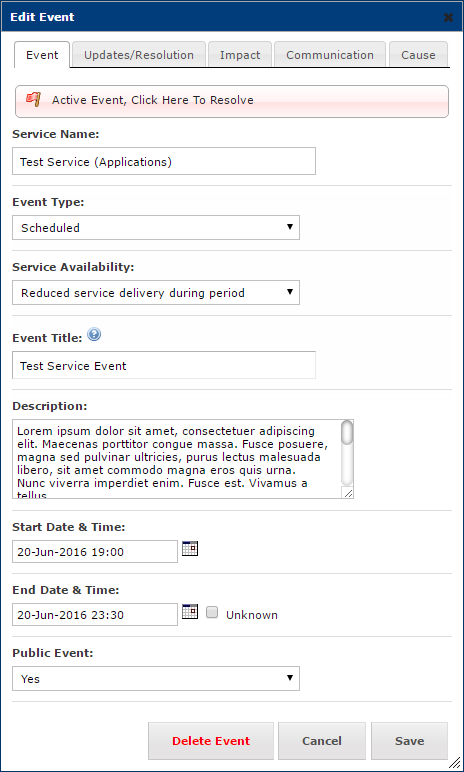
When editing an event you may also click the top bar to resolve an event. Resolving the event will prompt another dialog box.
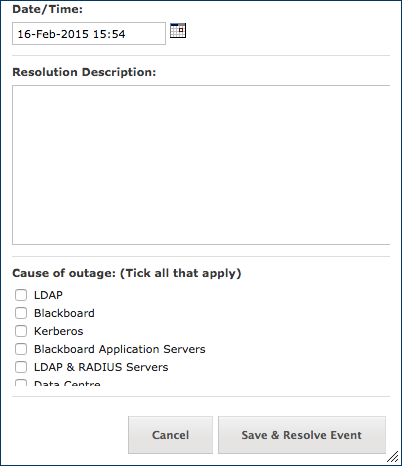
This will ask the user to add the date/time that the resolve took place, a quick description and a checklist of other services that might have been the cause of the outage.
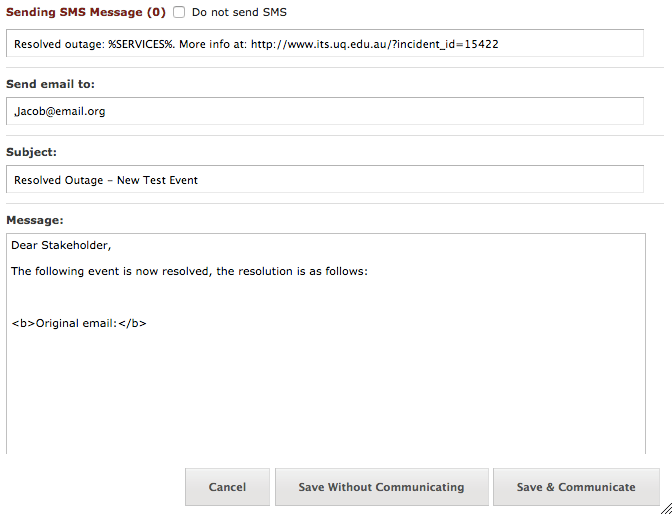
Once the event resolution data has been entered, ServiceView will automatically generate an email that will be sent to the determined stakeholders.The user is able to edit the email as well as the recipients as they see relevent.
When resolving the event, the user can also toggle across the top to add more information.

By updating the service event it will update the other services that were dependent on the particular service that was in the event.